Setting Up Amolto Call Recorder for Skype
If you need to record podcast interviews on the cheap, and by cheap I mean free, Skype with Amolto Call Recorder is a great options. It's reliable, provides excellent sound quality, and has the ability to record in split-track (this means each person will have their own audio file and this is a MUST as far as I’m concerned). I personally used the free version of Amolto for two years and didn’t have single issue (other than typical Skype connection issues).
Below is a tutorial of the settings I use for Amolto Call Recorder for Skype.
Step 1
Download Amolto Call Recorder for Skype
Step 2
Run the installation wizard and keep the box checked to launch the application after it's finished installing.
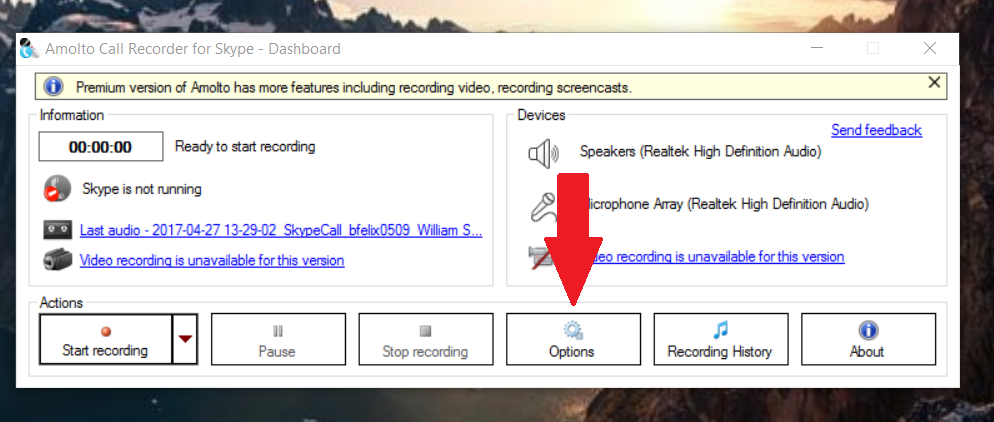
Step 3
Click the Options button.
Step 4
Adjust the settings in the General tab to fit your personal preferences.
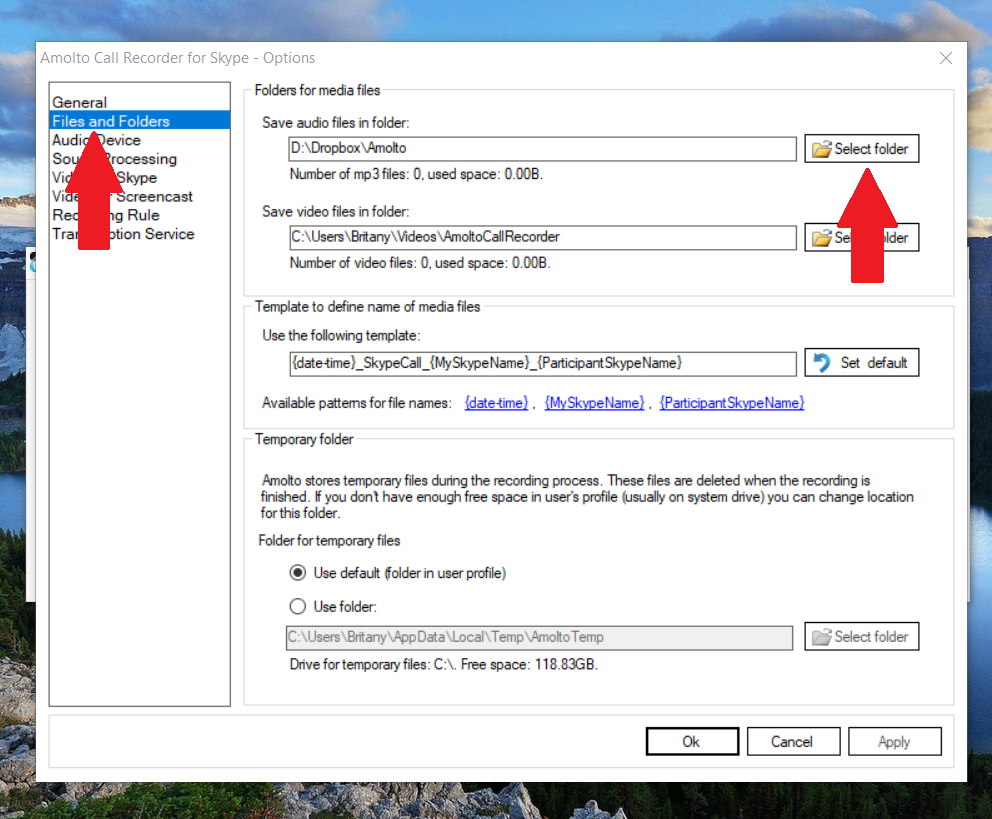
Step 5
Go the Files and Folders tab to set the destination for where you would like the audio files to be automatically saved when finished recording. I personally prefer to use a folder in my Dropbox so I don't have to worry about losing all my interviews if my computer crashes.
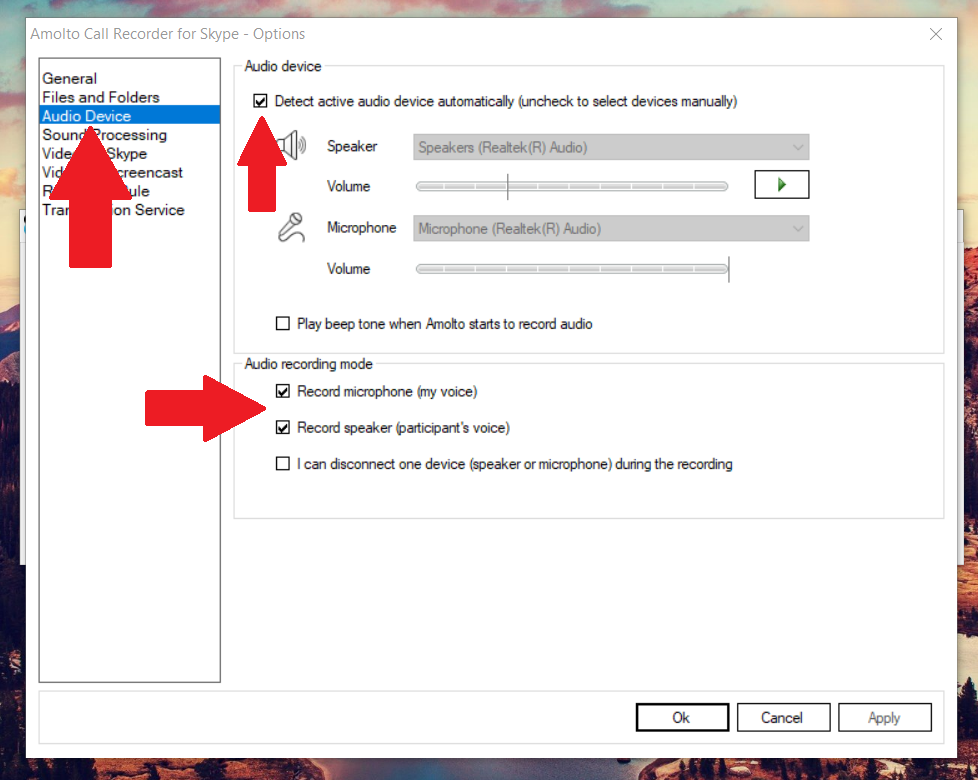
Step 6
Go to the Audio Devices tab to set the audio settings. Check the box that allows for automatic detection of your audio device. This mean, if you're microphone is plugged in and turned on, it should be automatically selected. However, it's always a good idea to double-check this before recording. Next, make sure the boxes for recording both you and your guest's voice have been checked (it should default to this).
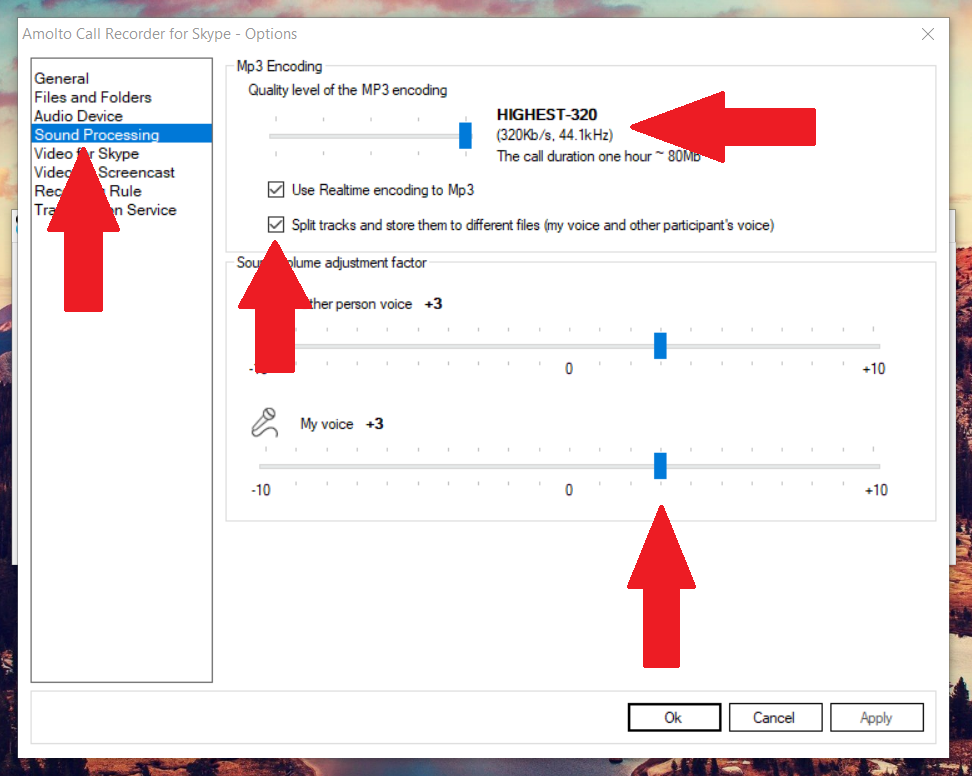
Step 7
Go to the Sound Processing tab and adjust the slider to allow for the highest quality level of MP3 encoding. Next, check the box that says "Split tracks and store them to different files." This is very important! Lastly, adjust the volume for both you and your guest (speaker). it's better to err on the side of caution and be a little too quiet than too loud. Quiet audio is much each to fix in during editing than audio that is too loud and clips.
Step 8
You can ignore the video settings as you should never be conducting your Skype interviews via video since it uses too much bandwidth and is likely to cause connection and/or quality issues.
Step 9
When you go to conduct your first interview via Skype, make sure Amolto is open and running. You might see a box at the top of your Skype desktop app that asks if you want to allow Amolto to have access. If this appears, just click the "Allow access" button.
Step 10
As long as Amolto is running (and the settings were not changed), Amolto will automatically start recording when a Skype call begins.
Step 11
Once you've finished the Skype call, Amolto should automatically stop recording and save the audio files to the destination you previously selected in Step 5. To access these files, you can either go the folder where they were saved or you can click on the "Recording History" button from the main Amolto dashboard to bring up a list of all your recordings.
Step 12
Select the recording you're looking for and click the blue link towards the bottom of the screen that displays the file location. A menu will pop up and you can then select "Go to file location".